Here is yet another Infosec lab to test cybersecurity tools. However, with just a laptop available at the moment, the idea is to leverage the Cloud to expand computing power. The plan is to mostly use machines available with AWS Free Tier, and deploy resource intensive applications on local VMs on my laptop. Since this is a testing environment where vulnerable applications will be deployed, the idea is to leverage private IPs whenever possible to reduce exposure. Wireguard VPN will be used to allow the machines in the Cloud to communicate with the local virtual machines.
The current project is to monitor common vulnerable applications using Wazuh, a SIEM and XDR open source platform used for threat prevention, detection and response.
Deploying Wazuh central components on the local VM
Given the hardware requirements for Wazuh central components (indexer, server and dashboard), they will be installed “on-premise” inside a virtual machine on my laptop. It is pretty straightforward to follow the all-in-one installation guide for this step.
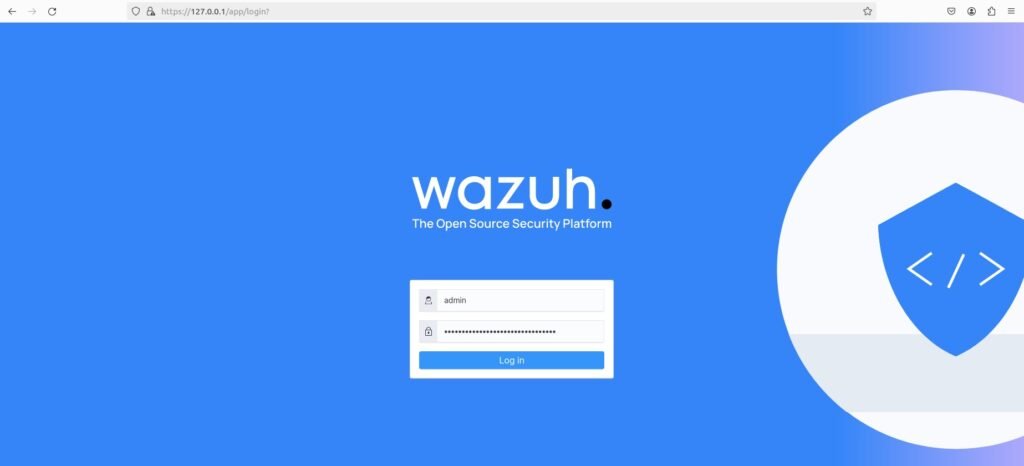
curl -sO https://packages.wazuh.com/4.7/wazuh-install.sh && sudo bash ./wazuh-install.sh -aAt the end of the installation, the credentials will be displayed in the terminal, you can use them to access the web interface.
To avoid the Wazuh dashboard from being accessible from any IP, you can edit the parameter server.host in the file /etc/wazuh-dashboard/opensearch_dashboards.yml. Here, it will be replaced with the IP address of the local VM host-only interface.
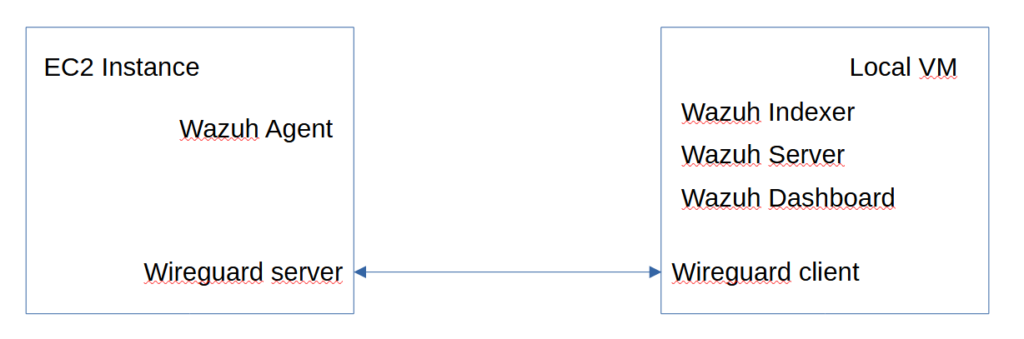
server.host: 0.0.0.0 # replace with your VM host-only IP address for exampleA Wazuh agent needs to be installed on the endpoint that we want to monitor, an AWS t2.micro EC2 instance in this scenario. It will need the IP address of the Wazuh manager that it needs to contact, namely the address of our local VM. Since it is a private IP address, we will leverage Wireguard VPN to enable the communication between the agent and the manager. We will configure an EC2 instance as a Wireguard Server, and the local VM as a Wireguard client.
Deploying an EC2 Wireguard Server in AWS
We first deploy the EC2 instance in the AWS cloud, and then use the following commands to install the Wireguard Server on the instance.
sudo apt update

# Enable IP forwarding
echo "net.ipv4.ip_forward = 1" | sudo tee -a /etc/sysctl.conf
sudo sysctl -p

# Install Wireguard
sudo apt install wireguard

# Configure the server private and public keys
cd /etc/ wireguard # create the folder if it does not already exists
umask 077
sudo wg genkey > privatekey
sudo wg pubkey < privatekey > publickey
The next step is to create the configuration for the wg0 interface, that will be used for the VPN tunnel:
sudo nano /etc/wireguard/wg0.confInsert the following content:
[Interface]
Address = 10.10.5.1/24
SaveConfig = true
ListenPort = 51820
PrivateKey = <content of server privatekey file>
PostUp = iptables -A FORWARD -i %i -j ACCEPT; iptables -t nat -A POSTROUTING -o eth0 -j MASQUERADE
PostDown = iptables -D FORWARD -i %i -j ACCEPT; iptables -t nat -D POSTROUTING -o eth0 -j MASQUERADE
The network used for the tunnel needs to be unique in your environment and should not be the address of an existing network interface. For instance 10.10.5.0/24 is the network address in this case, with the interface of the server having the address 10.10.5.1.
Ensure that eth0 is the name of the interface that is connected to the internet. If not, change it for the relevant interface name in the iptables directives.
If you want your VPN server to start every time you restart your machine, you can use the following commands:
sudo systemctl enable wg-quick@wg0
sudo systemctl start wg-quick@wg0
Else, you can run this command when you need to start your VPN connection:
sudo wg-quick up wg0Deploying a Wireguard Client on the local VM
Next, deploy the Wireguard client on the local virtual machine using the same commands as previously for the server, and generate the private and public keys for the client.
Insert the following configuration in the file /etc/wireguard/wg0.conf on the local VM.
[Interface]
PrivateKey = <content of client privatekey file>
Address = 10.10.5.2/24

[Peer]
PublicKey = <content of server publickey file>
Endpoint = <Public IP of your EC2 instance>:51820
AllowedIPs = 10.10.5.0/24
Here, the IP address of the client is 10.10.5.2. The allowed IPs should be filled with the IPs that should be allowed to pass through the tunnel. In this case, we only want the traffic destined to the EC2 instance (especially the Wazuh agent) to pass through the VPN tunnel.
P.S.: Since your EC2 instance is located in the AWS Cloud, it will be assigned a different public IP address every time you restart it. Hence, you will need to configure properly the endpoint IP address in the wg0.conf file before building it. Another option is to assign an AWS elastic IP address to your EC2 instance so that you will have a fixed IP address (be aware that this option will incur some cost).
Adding the public key of the client in the EC2 Wireguard server
You need to edit the wg0.conf file on the Wireguard server to add the public key of your client on the EC2 instance. You should add the following content to the /etc/wireguard/wg0.conf file on the EC2 instance:
[Peer]
PublicKey = <content of client publickey file
AllowedIPs = 10.10.5.0/24
You can bring down and rebuild the tunnel interface to take the updated configuration file into account:
sudo wg-quick down wg0
sudo wg-quick up wg0
Deploying the Wazuh agent on the EC2 instance
The Wazuh agent can now be installed on the EC2 instance using this guide.
sudo su
curl -s https://packages.wazuh.com/key/GPG-KEY-WAZUH | gpg --no-default-keyring --keyring gnupg-ring:/usr/share/keyrings/wazuh.gpg --import && chmod 644 /usr/share/keyrings/wazuh.gpg
echo "deb [signed-by=/usr/share/keyrings/wazuh.gpg] https://packages.wazuh.com/4.x/apt/ stable main" | tee -a /etc/apt/sources.list.d/wazuh.list
apt-get update
WAZUH_MANAGER="10.10.5.2" apt-get install wazuh-agent
systemctl daemon-reload
systemctl enable wazuh-agent
systemctl start wazuh-agent
For the IP address of the WAZUH_MANAGER, you should enter the IP address of the VPN tunnel interface corresponding to the local VM.
Bringing up the VPN tunnel in the client
You can now bring up the tunnel on your local VM and ping the EC2 Wireguard server:
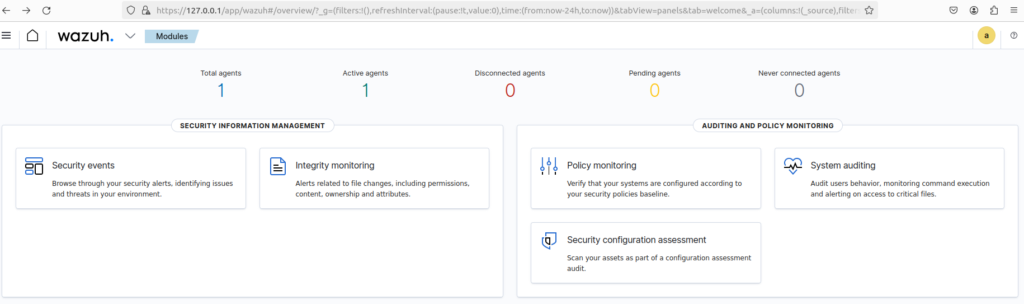
sudo wg-quick up wg0ping 10.10.5.1That’s it, you are all set, you should be able to see in the Wazuh dashboard that one active agent is now detected: the remote EC2 Wazuh agent is able to communicate with the local Wazuh manager.